使用 GitHub Actions 将博客部署到 GitHub Page
2022年3月9日大约 2 分钟
使用 GitHub Actions CI 将博客部署到 GitHub。
网上有很多文章,但是我仍要重新写一遍。
这东西别迷信什么权威,正所谓猫有猫道,狗有狗道,每个人的习惯不一样,做法也不一样,但最后的效果都差不多。别看谁和谁说的不一样,就认为一定有一个错的。
生成 ssh 密钥对
win10 和 win11 系统可以直接使用 powershell,Linux 和 Mac OS 也可以直接使用,其他系统请自行想办法解决。
使用以下命令生成密钥对[1]
ssh-keygen -t ed25519 -C "youer@mail.com" -f ./key.txt其中参数有:
-C: 注释-f: 文件
然后会让你输入密码,我们不需要密码,直接按回车即可。
然后就可以在你打开 powershell 的地方找到 key.txt 和 key.txt.pub 两个文件,将 key.txt.pub 重命名为 key.txt.pub.txt,方便打开。
为仓库添加公钥
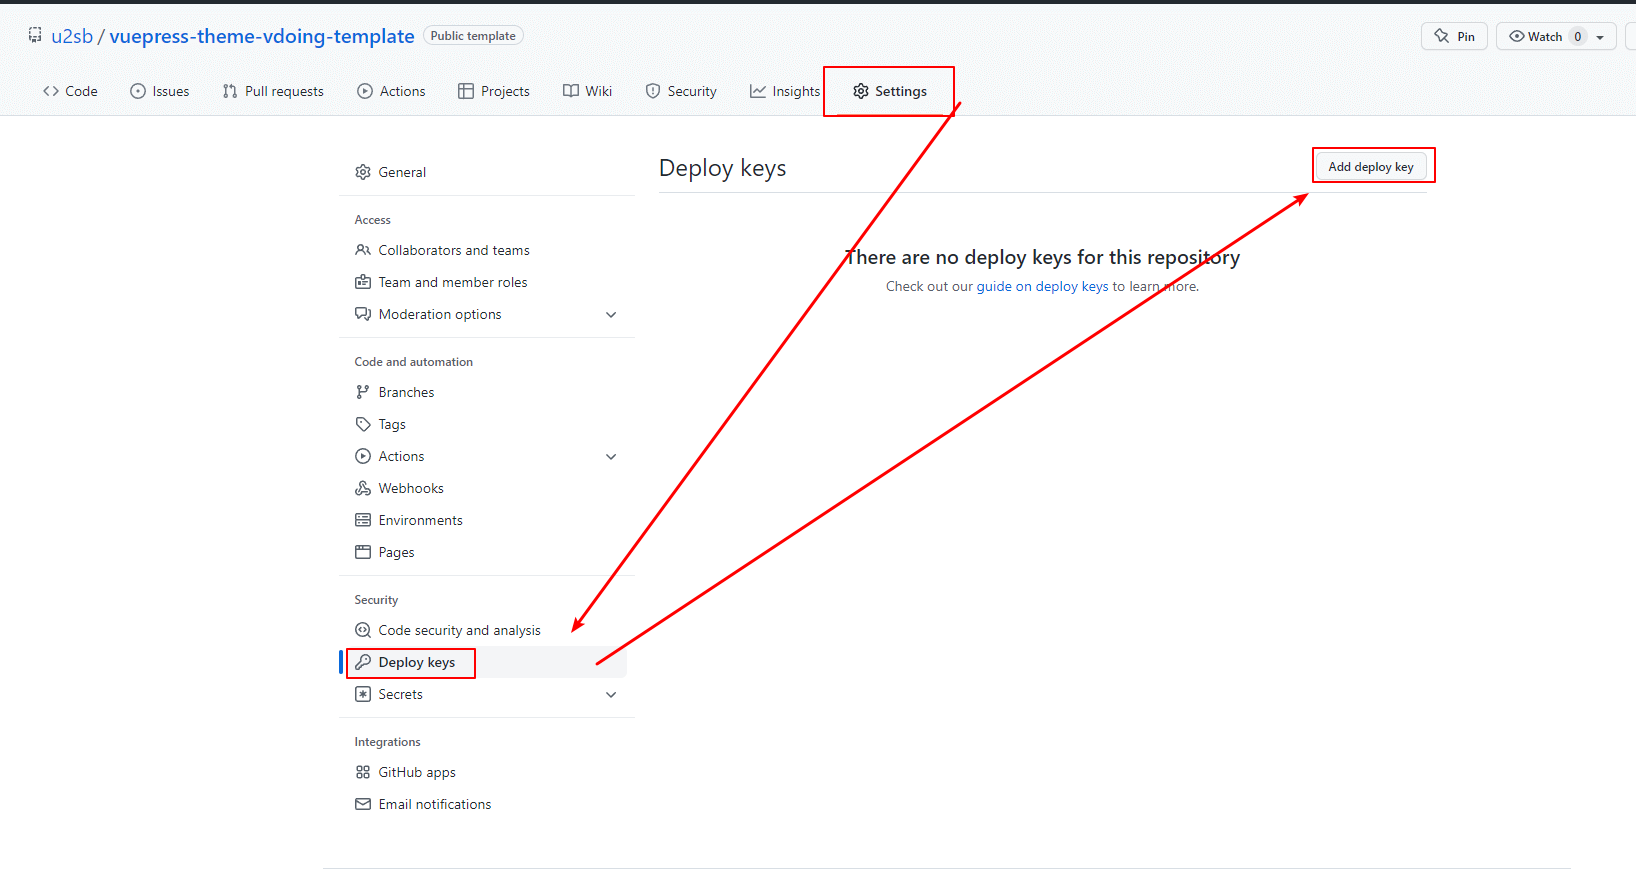
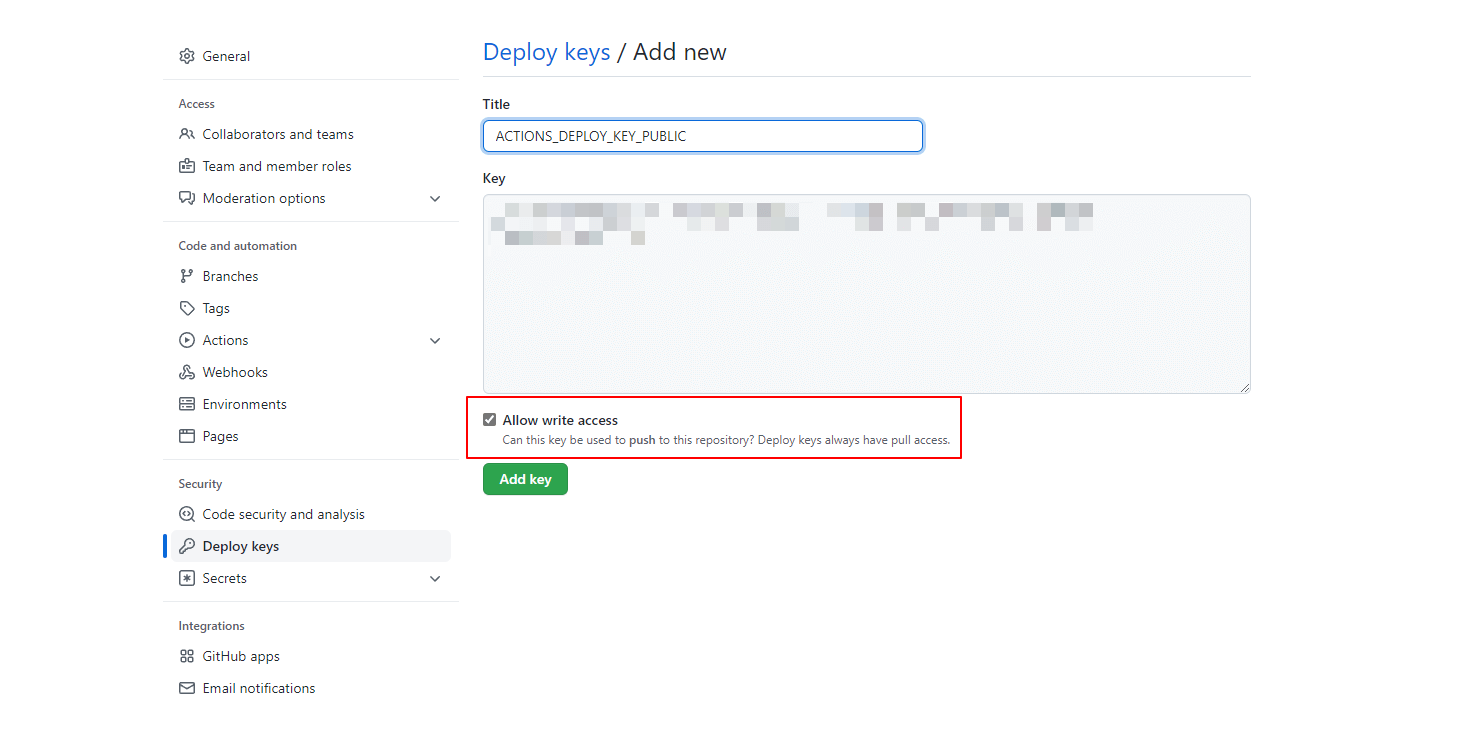
打开 GitHub 仓库的 Settings - Deploy keys,添加公钥,内容就是前面生成的 key.txt.pub.txt 的内容。下面的 Allow write access 一定要勾选[2]。
注意是仓库的设置,不是账户的设置。


添加私钥到 Actions Secrets
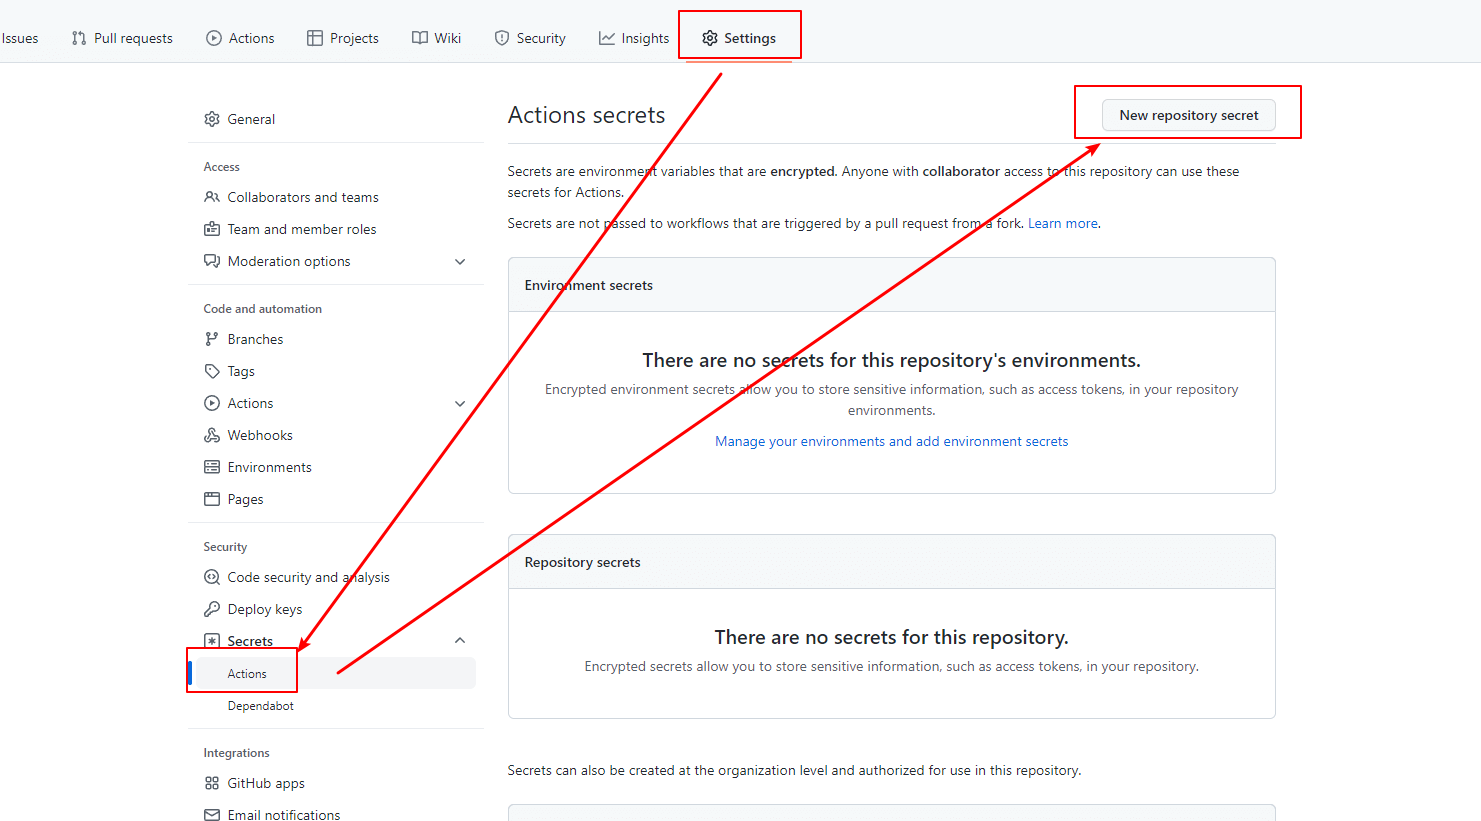
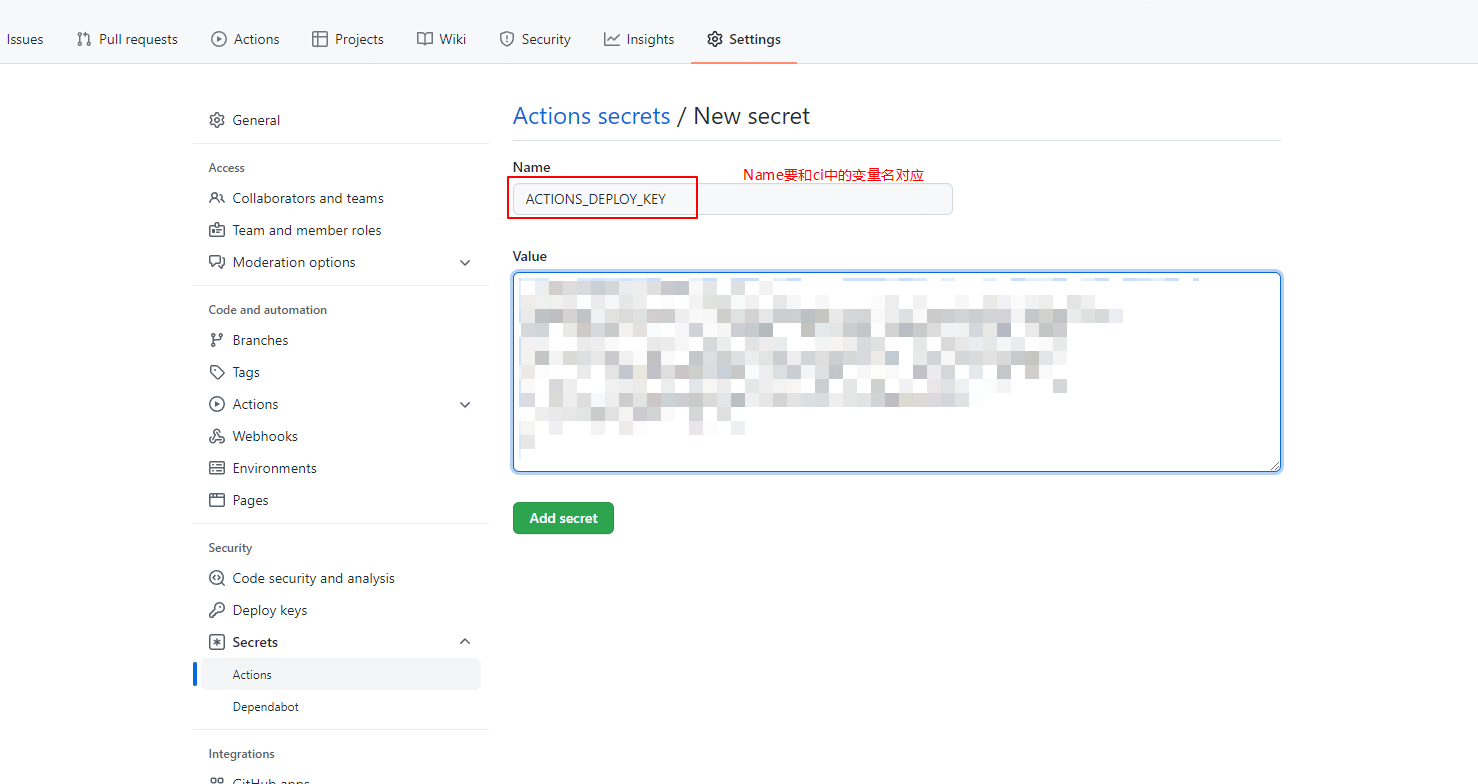
打开 GitHub 仓库的 Settings - Secrets - Actions,添加 repository secrets,内容就是前面生成的 key.txt 的内容[3]。
注意 Name 要和 CI 中的变量对应。


编辑 CI 文件
# .github/workflows/deploy.yml

name: deploy

# 在main分支发生push事件时触发。
on:
  push:
    branches:
      - main

env: # 设置环境变量
  TZ: Asia/Shanghai # 时区(设置时区可使页面中的`最近更新时间`使用时区时间)

jobs:
  build:
    runs-on: ubuntu-latest # 运行在虚拟机环境ubuntu-latest

    steps:
      # 检出
      - name: Checkout
        uses: actions/checkout@v2

        # 安装 node
      - name: Setup Node
        uses: actions/setup-node@v3
        with:
          node-version: "16.x"
          registry-url: "https://registry.npmjs.org"
          cache: "yarn"

        # 构建
      - name: Build
        run: |
          yarn install
          yarn build

      # 发布到 gh-page 分支
      - name: Deploy github
        uses: peaceiris/actions-gh-pages@v3
        with:
          publish_dir: ./dist
          deploy_key: ${{ secrets.ACTIONS_DEPLOY_KEY }}
          user_name: "github-actions[bot]"
          user_email: "github-actions[bot]@users.noreply.github.com"
测试
推送到 GitHub 测试。
注意事项
生成的密钥对文件,一定要销毁,不要保存,这东西存着非但没用,反而是隐患。